HOUDINI - INFINITE OCEAN SIMULATION
INTRODUCTION
In this module, we are going to learn how to create an infinite ocean. This is a bit advanced concept so a prerequisite knowledge of flip tank simulation is needed here.
CREATING AN OCEAN
Start by creating an empty geometry node and rename it as "ocean" and enter it's SOP level.
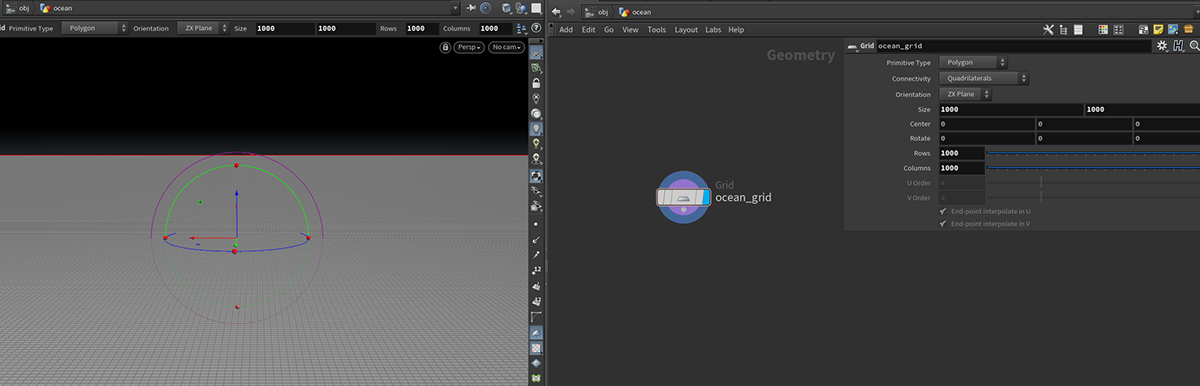
Create a grid and rename it as "ocean grid".

Let us make the grid bigger by setting it's size to 1000 by 1000. Let us also crank up the rows and columns subdivisions to 1000 by 1000 as well.
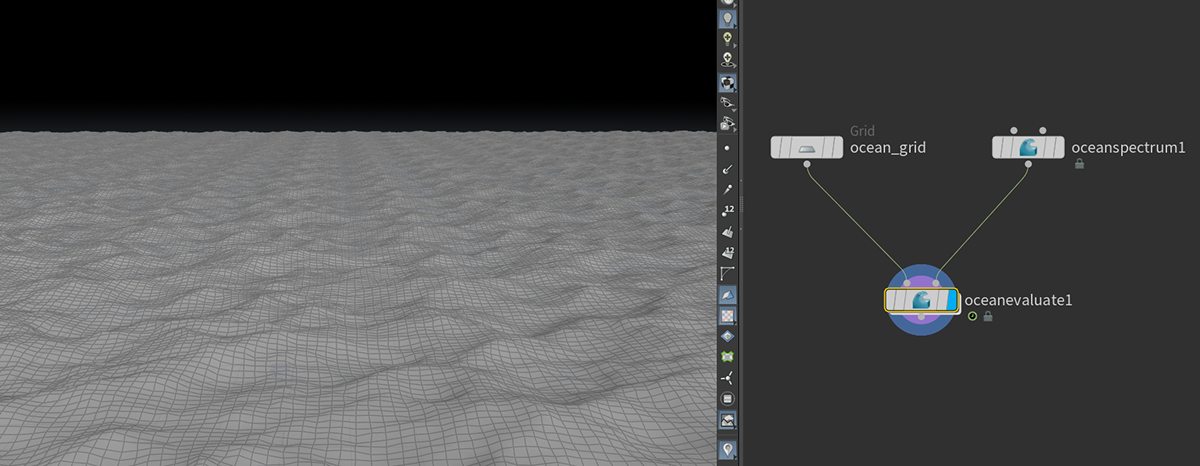
Next we are going to deform the grid using 'ocean spectrum' node. To preview the deformation of the ocean spectrum, we will add an 'ocean evaluate' node. Our connections and result should look like this:
In order to make the ocean simulation loop, we can turn on the 'loop over time' attribute on the ocean spectrum node. We can also adjust the looping period.

We can also use the 'grid size' parameter to determine the amount of space over time in which the ocean repeats as well.
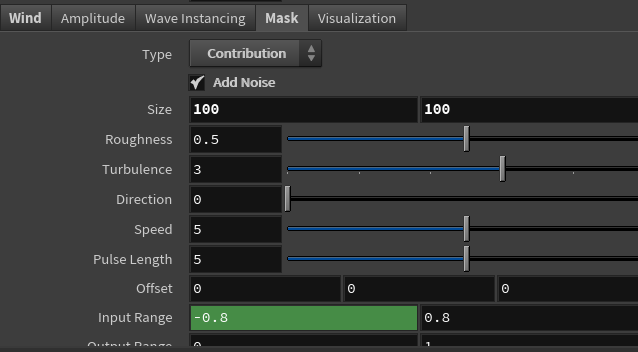
Right now, the ocean pattern is repeated, so if we increase the grid size, we can get rid of the repetitions. we can also enable 'add noise' under the mask tab and set type to 'contribution' to also break up the repeated patterns.


If we create a camera in the object level and look through it, we should see that the repeating patterns are now gone. And we can playback to see the ocean deform. We can turn on the 'cusp attribute' and 'visualize cusp' on the ocean evaluate node to visualize our ocean properly.
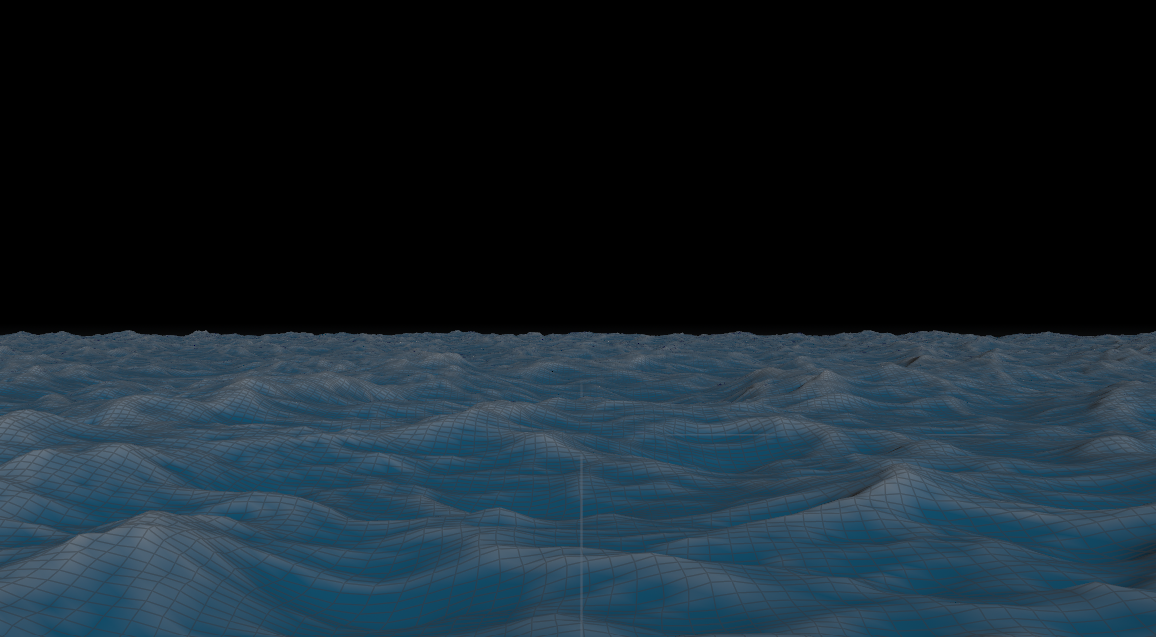
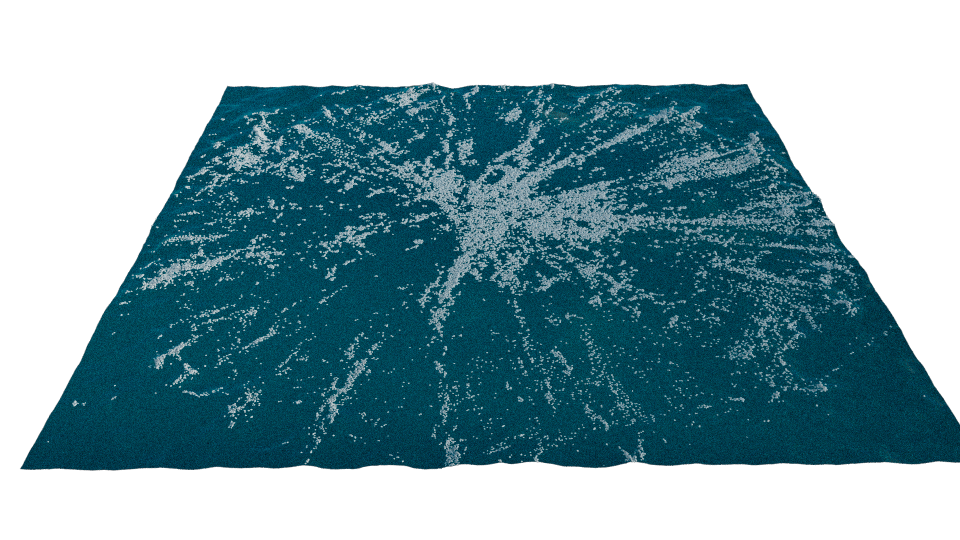
Now we have an ocean.
TIP: We can adjust the different parameters under the ocean source tabs to get different looks and behaviour for the ocean.

We can create massive waves by adding an 'ocean waves' node. We can combine this together with the ocean spectrum node to really modify the behaviour of the ocean.
As a bit of housekeeping, let us ensure to connect null output nodes to our ocean setup like below:
As a bit of housekeeping, let us ensure to connect null output nodes to our ocean setup like below:

ADDING FOAMS TO THE OCEAN
Now, let's generate some foams to the ocean. Start by creating an empty geometry node named "ocean foam" and enter into it's SOP level.
Firstly, let us use an object merge node to import the null output of our ocean waves into this foam SOP level. This should import our ocean.

Next, let us create an 'ocean foam' node as shown above. This ocean foam node needs the ocean wave data as input to generate the foams, which was why we imported the ocean waves null output.
Now if we playback, we will see the foam particles are generated. However, they are not fitting our ocean grid.

So to adjust this, we will use relative referencing to match the grid size (and center) and the ocean foam region size (and center). Now the foams should match with the ocean.


We can adjust the foam emission density to increase or decrease the amount of foams generated.
Right now, the foam particles are not moving with the wave. To ensure that the foam particles move with the waves, we can enable 'displace particles'.
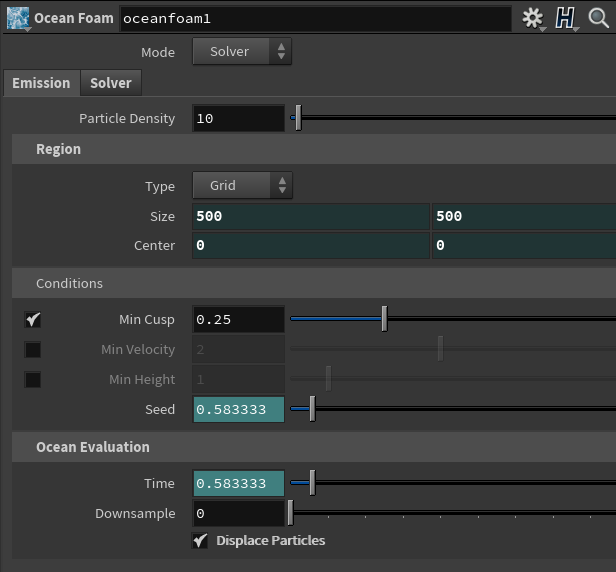

We can also adjust their lifespan, and other parameters of the foam under the 'solver' tab.

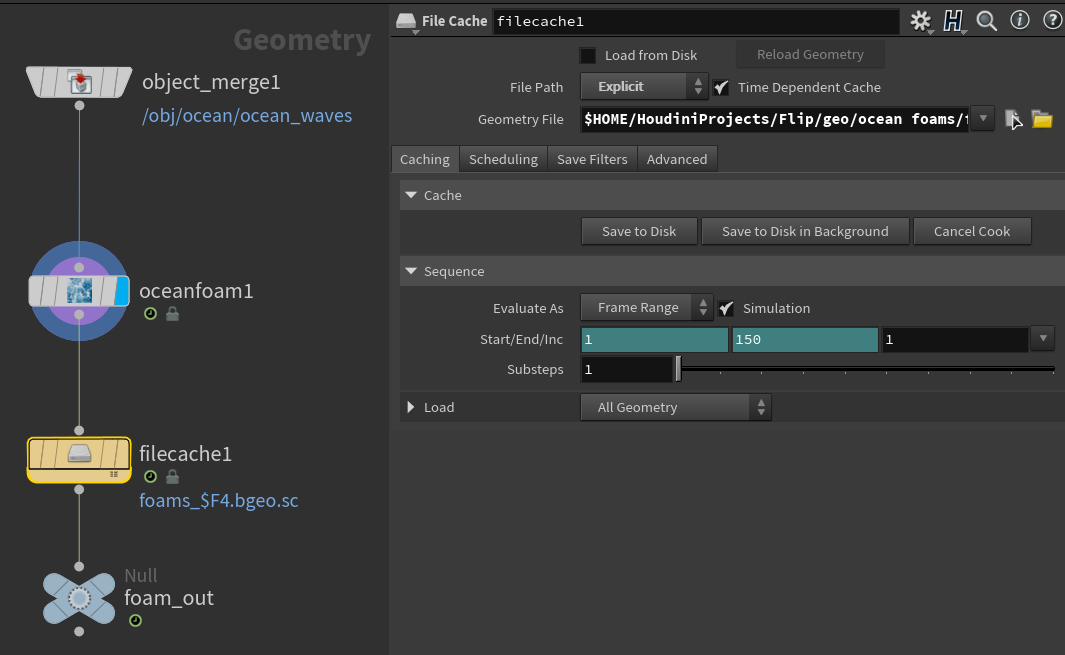
Next, we need to cache the foam particles since they are simulated particles. So we will add a 'file cache' node to the ocean foam node and cache it to an output directory.
ADDING SECONDARY EFFECTS TO THE OCEAN
Now that we have an ocean that works, let us explore how we can create a secondary effect on the ocean. This effect can be applied to a situation whereby we want to create an object emerging from the ocean (or falling into the ocean). The idea is we are going to mask out the area of the ocean where we want the effect to happen, and if we need to, we can actually add a flip tank simulation at that masked region and blend it together with the ocean.
For this aspect, we are going to keep things simple. So let us assume we want to create a circular waves that grows because something is trying to emerge from the ocean.
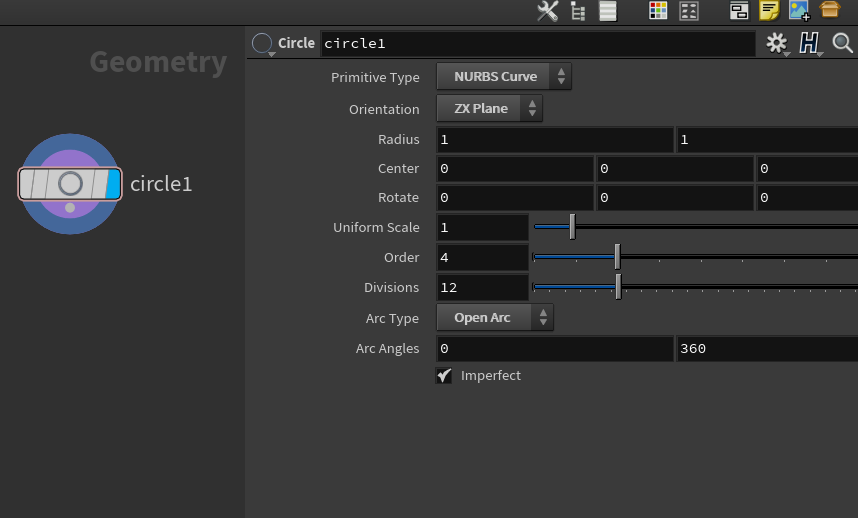
Let's start by creating an empty geometry node named "circular waves" and enter it's SOP level. Let's create a circle node and perform the following settings on it:
It does not have enough points currently, so let's add a resample node to add more points.

Next, let us add a transform node and animate the curve growing big.

Next, let us setup our ocean spectrum, ocean evaluate, and grid nodes and feed the output of the curve transform node into the ocean spectrum like below, and increase the resolution and size of the grid too.

We can see the result we get as a result of feeding the circle curve into the ocean spectrum. The waves only appears around the curve regions. We actually do want waves everywhere else. For that we are going to create a mask.
Let us copy the circle node networks up to the ocean spectrum like below:

Now, let us change the circle in the mask to polygon and closed arc and add an extrude node, and use a transform node to reposition it. Also add a vdb from polygon node to convert it to a volume object because we need the SDF. Because the object is growing, the vdb changes overtime and this can impact our scene. So to make it lighter, we will need to cache it out with a file cache node.
The mask connections should look like below:

And if we connect it to the existing setup, we will have something like below:

Notice that we connected the mask into the mask input of the ocean spectrum node. What the mask does is that wherever the vdb is, there won't be any waves, but outside the vdb, we will have waves. Also the input type under the mask node of the ocean spectrum mask is set to suppression.
So we have the following result when it is combined with the circle growing effect.

Then like we learnt earlier, we can also add foam particles to this effect and cache it out.
If we need to take the ocean to Maya to render, we will need to first cache the ocean mesh to an alembic file by connecting a rop alembic output node to the ocean evaluate null output.
The foam particles can also be exported to Maya as Houdini digital asset like we learnt in the Maya-Houdini workflow module.

The Maya viewport and render previews of the ocean mesh and the foam particles are as shown below: